Skip to content
 This post may contain affiliate links. This means that if you make a purchase through one of these links, we may earn a small commission at no additional cost to you.
Creating a community around your content is essential in today’s digital age, whether you’re a creator, coach, or entrepreneur. One of the best platforms for building such a community is Skool.com.
This platform makes it easy to host a paid or free community, create courses, manage coaching programs, and foster engagement all in one place.
In this guide, I’ll walk you through how to set up a Skool community step-by-step, with key features that make it ideal for creators
Skool is a community platform designed for creators and coaches who want to build interactive spaces for their audience. Whether you’re offering a free or paid community, Skool provides tools like classrooms for courses, discussion boards, and gamification features to encourage engagement.
It’s perfect for anyone looking to create communities around their courses, coaching programs, or mastermind groups.
If you’re looking to create an online community, Skool.com offers the perfect balance of simplicity and powerful features. It’s an all-in-one platform that allows you to host discussions, deliver educational content, and manage memberships—whether your community is free or paid.
With features like gamification, leaderboards, and easy integration with payment systems, Skool helps you create a vibrant, engaging space for your audience.
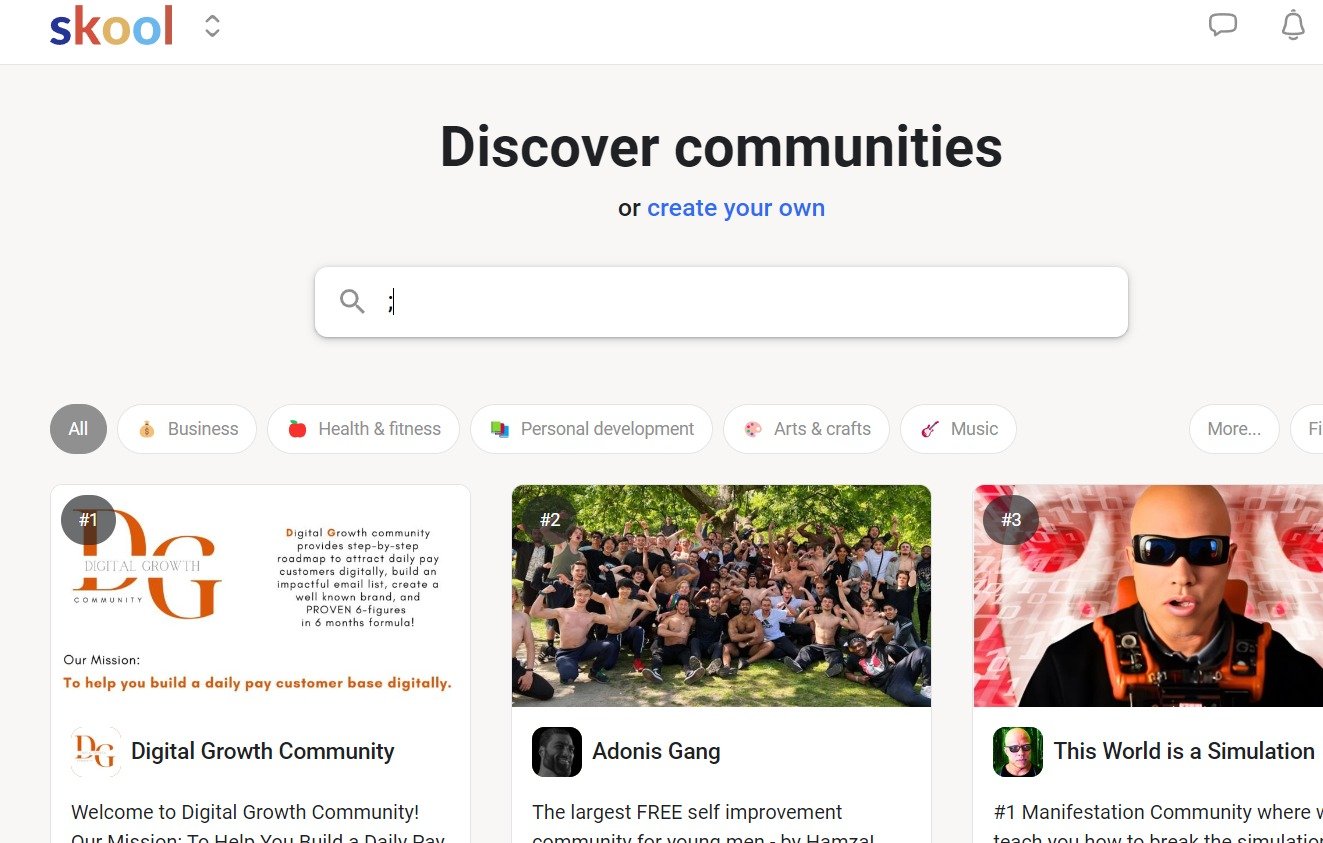
First, head over to Skool.com and create an account.
You’ll see various communities already thriving on the platform. These can serve as great inspiration as you set up your own space.
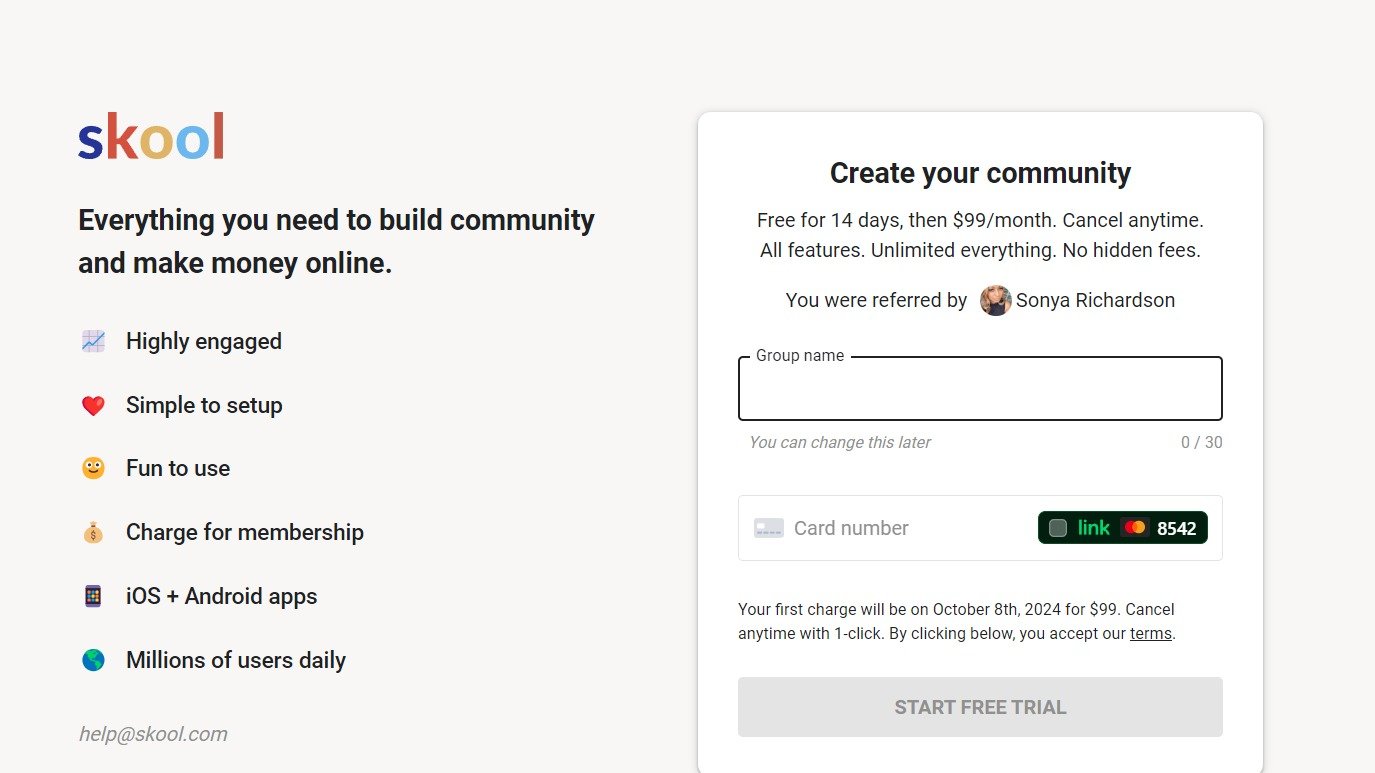
Once logged in, click the “Create a Community” button. Here, you can decide whether your group will be:
Public: Open for anyone to join.
Private: People must request or be invited to join.
For this tutorial, let’s create a group called “Female Entrepeneurs Circle.” After choosing a name, you can sign up for a 14-day free trial, and afterward, the cost is $99 per month. This fee includes all the features Skool offers, so it’s a worthwhile investment for community management.
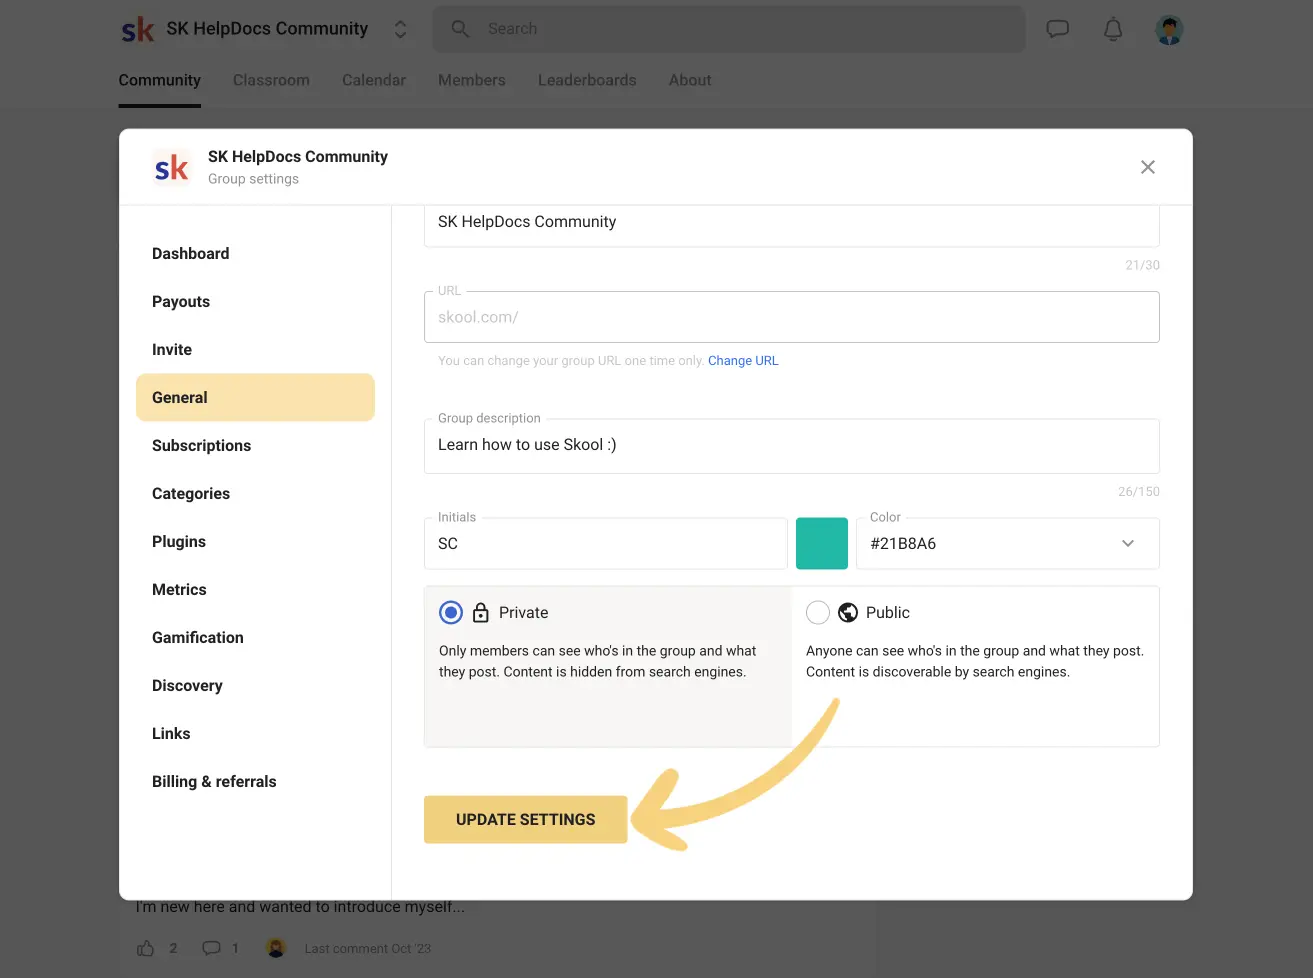
Personalizing your community is key to making it stand out. Here’s how to do it:
These customizations help your online community look professional and inviting.
Skool makes it easy to build an online community and monetize it. If you want to charge for membership, go to the “Subscriptions” tab and set your pricing. For example, you could charge $99 per month for access to exclusive courses, discussions, and coaching.
After connecting your bank account to Skool, you’ll be able to receive payments directly from members. This feature makes Skool perfect for anyone looking to build and monetize a community online without needing additional software.
To keep your members engaged and organized, set up discussion categories. For instance:
You can also create announcement channels where only admins post important updates. This makes your online community more organized and encourages meaningful interactions.
Skool allows you to enhance your community’s functionality with plugins. Some popular options include:
These plugins help you automate the onboarding process, making it easier to scale your community online.
One of Skool’s unique features is its gamification system. You can assign levels based on activity, incentivizing members to stay active. For instance:
Members earn points for contributing to discussions or completing tasks, unlocking rewards like access to new content or exclusive coaching calls. Gamification not only keeps your online community engaged but also encourages healthy competition.
If your community online revolves around education, Skool’s Classroom feature is perfect for hosting courses. You can upload videos, provide downloadable resources, and even lock certain content for paid members.
For example, you can offer a free mini-course in your community, while more advanced or exclusive content is gated behind a membership fee. This adds value and keeps members returning to your community for new learning opportunities.
Another great way to keep your online community engaged is by hosting live events like Q&A sessions or group coaching calls. With Skool’s Calendar feature, you can easily schedule recurring events and sync them with Zoom or Google Meet. You can even send automated email reminders to ensure high attendance.
The About Page serves as your community’s landing page. Be sure to include:
Your About Page is the first impression potential members get, so make it engaging and informative.
Building a successful online community takes planning and the right tools. Skool.com provides everything you need, from monetizing your community to keeping members engaged through discussions, courses, and events. With easy setup and features tailored for engagement, Skool is ideal for anyone looking to build and grow their community online.
Ready to build your community? Start your journey on Skool.com today and turn your audience into an engaged and active group that adds value to your brand.
The latest from
Digital products are anything you can sell online that doesn’t require shipping—think eBooks, printables, online courses, or design templates! You can create once, and sell forever.
To sell digital products online, you can start your own store on platforms like Etsy, Amazon, or Shopify, and voilà—you’re in business!
Great question, babe! Some top-selling digital products include:
Trust me, you’ll be amazed at how easy it is to create digital products to sell! Check out our shop to get started
There are some pretty fab places to get started with zero cost!
You can list digital products on Etsy, Baecons.ai, sell on Gumroad, or even use Payhip. These platforms are super user-friendly and perfect for beginners.
Selling digital products on Etsy is simple!
Create an Etsy shop, upload your digital product (PDFs, images, etc.), and set your price.
Etsy handles the rest, including sending the file to your buyer automatically. Easy peasy!
Honestly, there’s no “one size fits all.” For many, Etsy is amazing because of its built-in audience.
Shopify is great if you want your own store with more control. Click on the name to get a trial.
Amazon is fab for eBooks or print-on-demand.
Beacons.ai and Payhip are also great options if you want a simple setup with lower fees. Pick what suits your hustle best, girl
Once you’ve created your products, it’s all about getting them in front of the right people! Market your digital products on social media, email lists, and blogs. Use platforms like Shopify or Beacons.ai to sell and watch those sales roll in. It’s like passive income heaven!
If you’re looking to make quick cash online, creating and selling digital products is one of the fastest ways. Once your product is live, you can sell it over and over again without lifting another finger! #passiveincome
Oh, absolutely! Shopify is perfect if you want to sell digital products on your own terms, without relying on a marketplace like Etsy or Amazon. It gives you total control over your shop and branding. Plus, you can sell unlimited digital products!
Start small! Buy one of our PLR digital products, list it on Beacons.ai or Payhip, and share it with your social media followers. It’s super easy to get started, and you’ll be amazed at how fast you can make sales!
Oh, for sure! Thousands of women are doing it every day by selling digital products, offering services, or running online businesses. With a little creativity and some hustle, you can make money online from the comfort of your couch. Who says you can’t have it all?
You can create and sell digital products without spending a dime using platforms like Gumroad or social media. Use free tools like Canva to design products like eBooks, guides, or printables, and then promote them on Instagram or Facebook to your followers.
Navigate
Contact
Got questions or need support? We’re here to help! Reach out to us anytime.
Join our community and get exclusive offers, product updates, and tips straight to your inbox.
© 2024 ShepreneurCEO | Terms and conditions | Refund and returns
Hey Gorgeous! 🍪
We use cookies to make your browsing experience as fabulous as you are.
Accept to continue slaying!
We noticed you're visiting from Germany. We've updated our prices to Euro for your shopping convenience. Use United States (US) dollar instead. Dismiss
 Optimized by Seraphinite Accelerator